Wednesday, June 22, 2016

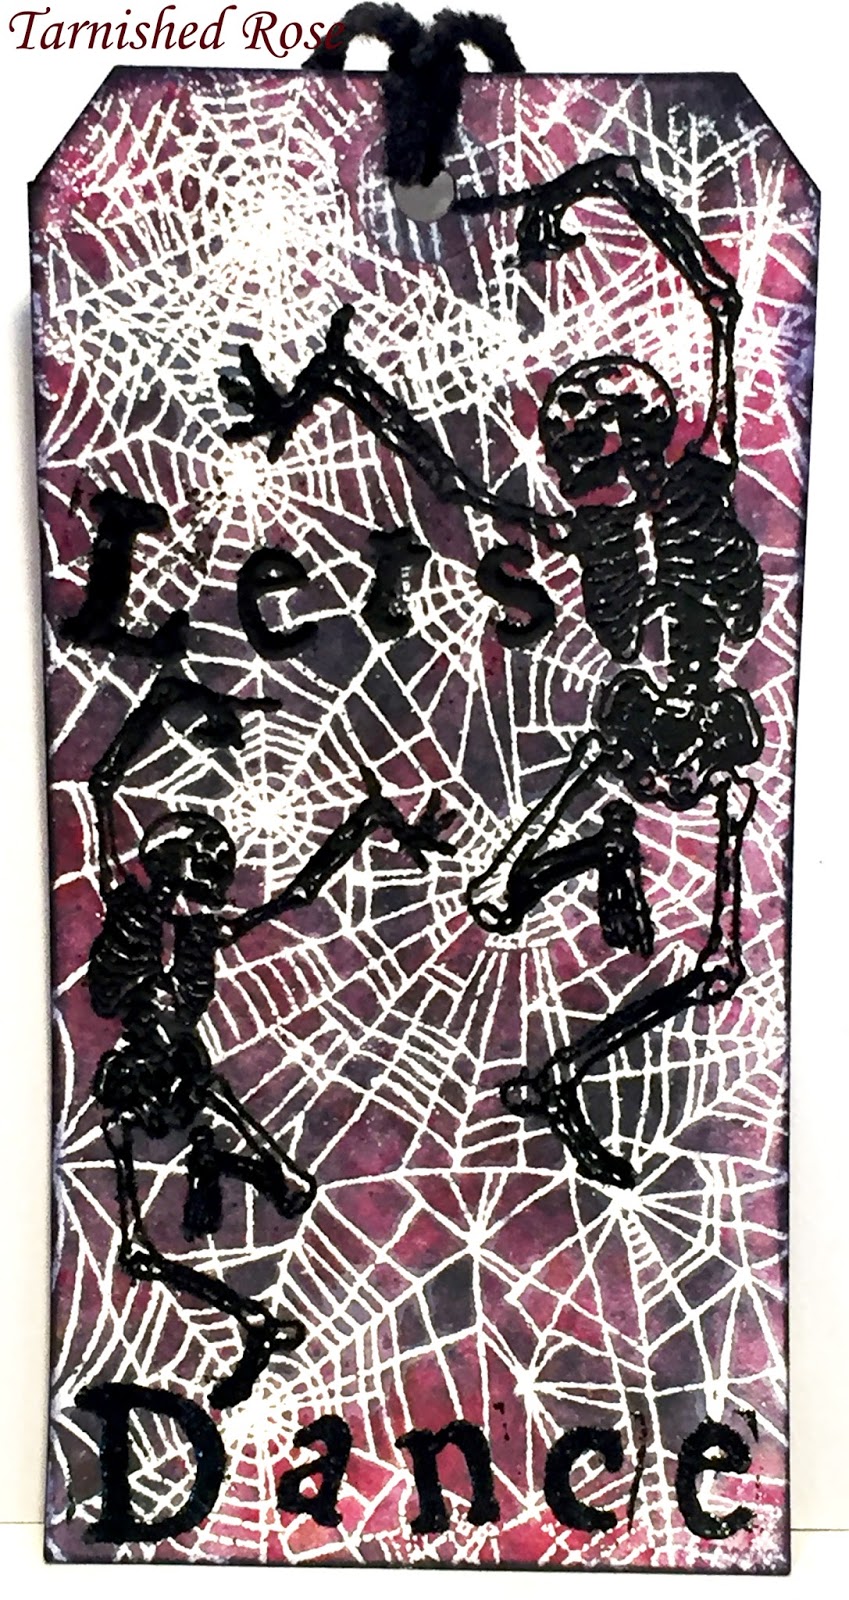
Let's Dance!

Good morning everyone!  As promised earlier this month, here's the instructions on how I created my Let's Dance tag for Skelli-Fest that was held earlier this month on the Lost Coast Portal to Creativity blog.  


Lots of Lost Coast Designs goodness here!  Spiderweb Background, Dancing Skeletons, and Old Typewriter Alphabet.

So here we go..............

1.  Stamp Spiderwebs Background in white pigment ink and emboss with clear or white EP.
2.  Sprinkle on Nuance powders in red and gray and mist with water, moving the tag around until the colors blend and look like you want them to (totally subjective).
3.  Remove the EP using a hot iron and plain copy paper.  This make take several passes, making sure you keep moving to a clean spot on the paper (be careful not to get any on the iron).
4.  Stamp the Dancing Skeletons with black Versafine ink and then emboss with black EP.  
5.  Run a piece of black fiber through the hole.

It's a subtle looking design in the photo but in person the black embossing really stands out.  Hope you enjoyed!

Until later.........................


Marilyn

Monday, June 20, 2016

Chose to Fly....Projects for Gecko Galz plus a free digit stamp

Good morning!  I'm back with you today to share a few things I created for Gecko Galz using their wonderful digital collage sheets.


First up, a rolodex card I created for a swap on the Paper Traders Yahoo group.


I started by sprinkling some LSG Magicals onto my rolodex card then spritzing with water.  I trimmed the images from the Blue Bird of Happiness collage sheet, layered everything, and then glued it down.  Easy peasy.

I went a little shabby chic on this canvas.  If you know me, then you know I can't do shabby chic well, but this little canvas practically created itself.


I started by spraying a small canvas panel with LSG Sandra Dee Sepia and Cotton Candy Pink.  I them stenciled with some translucent embossing paste and the Plastic Canvas stencil by Dina Wakley.  Once that was all dry, I randomly stamped across the background with a Prima script stamp.  I next cut strips of paper from the Ever After Paper Pack to form a mat under my image which comes from the Gilded Lillies collage sheet.

I die cut some chipboard using the Sizzix Lace Die, embossed it with LSG Angel Wings Mauve and Hibiscus Rose Orange.  I layered this under a wooden filmstrip pieces and tucked it under the edge of the image.  I then die cut several more odds and ends and tucked them around my image to build the layers.

For the final touches, I die cut a floral piece, smeared glue on it, and sprinkled it with Pink Art Sugar.  I added a few Prima flowers and then dotted here and there with Mauve mica flakes around using soft gel medium.  I apologize for the lack of the specific items I used....I can't find my other page of notes.

For my last piece, I used this month's free digit stamp & a page out of my 8-1/2x11 journal.


I started by painting the digital stamp with Silks using Love Struck, Autumn Leaf, Chestnut Brown, Black Emerald, and Yellow Rose.

Gesso the page.  Spray with LSG Greased Lightening Green and Bells of Ireland Green.  Stencil on the background using LSG Queen of Hearts Red Magicals mixed with Liquitex modeling paste and TCW's 12x12 Sketch Grid stencil.  Follow this up by stenciling with Dylusions Cut Grass paint and TCW's 12x12 Morning Vines stencil.  Outline some of the vines with a white pen.

Randomly stamp across the page using the floral image from Hero Arts Friend Collage set.  Next, stencil To Choose, To Seek, and To Hear using a StencilGirl stencil and black embossing paste.

Splatter on a watered down mixture of white acrylic paint followed by black ink.  Cut some chevrons from a piece of chipboard, emboss them with Fired Brick and Black Soot Distress EP and add them to your page.

Now, finally, your free digi stamp:

Thank you for stopping by!  Don't forget to check out Gecko Galz's wonderful collage sheets, available on Etsy.

Until later..................

Thursday, June 16, 2016

Beach Day Card

Good morning everyone!  I have a great card to share with you today featuring quite a few Technique Junkies stamps.


1)  Stamp Sea Urchins onto a piece of cardstock using Versamark ink and emboss with LSG Terra Cotta Plum EP.  Trim.
2)  Stamp Clam Shells onto a piece of cardstock using Colorbox Cocoa ink.  Cut out two of the clam shells.
3)  Stamp Starfish onto a piece of cardstock using Colorbox Stucco ink.  Cut out a strip with the starfish being the focus.
4)  Stamp Beach Day onto a piece of paper using Colorbox Brown ink and then emboss with LSG Desert Moon Copper Teal EP.  Spray with Warm and Salmon Colorations.  Trim.
5)  Glue down your background (Sea Urchins) to your card, then glue down the starfish strip.  Arrange and glue down your clam shells.  Center Beach Day and glue.
6)  Run a piece of string down the left edge, securing underneath your starfish strip.

You're done!

Until later.........................


Marilyn

Wednesday, June 15, 2016

No Boundaries

Good morning everyone!  It's the Masculine Event over at Lost Coast Portal to Creativity and I've got my contribution to share with you.


This was a pretty simple card to make.  As most of you are aware, I'm just getting started with cards.
1)  Stamp Lost Cost Designs' Thick and Thin Men with white pigment ink onto a piece of watercolor paper you have gesso'd with black gesso.
2)  Emboss with black EP (hats & shoes) and LSG Terra Cotta Plum EP.
3)  Add more color with LSG Cheshire Cat Cherry and Art Anthology Glorious sprays.
4)  Using an oval Sizzix die, cut out your stamped and embossed image.
5)  Mat onto a piece of patterned paper (mine resembles stone blocks) and then onto a piece of light green card.  Score and fold.

Thanks for stopping by!

Until later.............................

Sunday, June 12, 2016

Spirit Bird - Skelli-Fest at Lost Coast Portal to Creativity

Good morning everyone.  Skelli-Fest over at the Lost Coast Portal to Creativity continues with Day 9, my day!  Don't forget to get your link added for a chance to win a $20 gift certificate to Lost Coast Designs or Carmen's Veranda!


1)  Stamp Bird Bones & Spirit onto a piece of cardstock and cut out.
2)  Color the bones with White Dylusions and the darker areas with Gray Nuance powder mixed with water.  Color the branch with LSG Sandra Dee Sepia.
3)  Stencil the background by mixing Red Nuance powder with modeling paste and Colorbox's Wave stencil.
4)  Randomly stamp just the text part of Dream over the tag.
5)  Mix Bright Yellow Nuance with some water & Gray Nuance in water.  Keep separated.  Randomly paint parts of the white area with both the yellow and gray Nuance.  Once dry, use a water brush to blend them together as well as pull some of the color out of the stenciled areas.
6)  Take a small piece of the colored modeling paste and use it for an eye.  Cover with Glossy Accents.
7)  Pop up the bird with foam squares and place slightly below the midpoint.  Glue down the Spirit image at the top.
8)  Outline Spirit with a black watercolor pencil and then smudge it with a waterbrush.
9)  Use soft gel medium to scatter black glass glitter across the tag.
10)  Outline the tag using some of the Gray Nuance powder mixed with water.

I love the way the bird seems to hover over the background.  This is a great tag to create, though it will take a bit to get it all done.  Hope you enjoyed!

I'm entering this in Dark 'n' Daring Challenges & Dream In Darkness

Until later....................


Marilyn

Thursday, June 9, 2016

Skelli-Fest at Lost Coast Portal to Creativity

Good morning everyone!  Lost Coast Portal to Creativity is holding it's 2nd Annual Skelli-Fest!  Everyone is invited to enter their skull or skeleton-themed project for a chance to win a $20 gift certificate to spent at either Carmen's Veranda or Lost Coast Designs.  You will need to visit Day 1 of the Skelli-Fest to enter your link.

Today is Day 6 of the festival and it's my day to show off.  I have a tag I created using some great stamps designs by Lost Coast Designs.  Stay tuned later this month to see the step-by-step.


I'm linking this to the Dark and Daring Challenge and the Dream in Darkness Challenge.

Until later................

Monday, June 6, 2016

Manga Dream

Good morning everyone!  The challenge this month over on the Lost Coast Challenge blog is Use Something See-through.  So, for my challenge piece, I used acetate.

Don't we all just have tons of this stuff laying around from old packaging?  I know I do.  So, in order to be a better person and recycle, I decided to use a piece for this ATC.


1)  Stamp you image from the Mini Manga Set with Stazon ink onto a piece of acetate and trim to fit.  Set aside for now.
2)  Stamp your background using one of the Grunge ATC Set backgrounds in Cocoa pigment ink.  Heat set.
3)  Sprinkle on several colors of Nuance powder, spritz with water, and dry.
4)  Take you Mini Manga image and paint the BACK with Metallique Steampunk Copper and Gold Rush, and Paper Artsy London Bus.  Dry.
5)  Outline your ATC with a white pen, also outline a view of the diamonds.
6)  Glue on your acetate with Glossy Accents.
7)  Stamp "dream" using the Old Typewriter Alphabet set and black Versafine ink.
8)  Add a few silver stars (I die cut mine from chipboard using an old Sizzix die).

Done!

Until later..................


Marilyn